One of the things that I have been spending time on lately is getting rid of local authentication in Azure architectures.
Local authentication: authentication using username/password, a key, or another means that does not rely on a central identity provider like Microsoft Entra ID. Using central authentication instead allow you to centrally control which identities can authenticate and perform intrusion prevention and detection centrally.
I’m a big fan of Azure managed identities and how they allow applications to use authentication based on Entra ID, without the need for secrets or certificates. More and more services in Azure support authenticating this way: Storage, CosmosDB, SQL, Data Explorer, Service Bus, I think every service we’ve been using. However, until recently we did not manage to authenticate to Application Insights using a managed identity.
But that’s changed towards the end of 2023 and today I gave it a spin. Spoiler: it works. And to get this working, you have to go through the following steps:
Creating the infrastructure
To get a running application that logs to Application Insights, you will need to create three pieces of infrastructure:
- A Web App. I choose to create a new web app and host it on a B1 plan. If leaving this on for a day or two at the most, the cost should stay (way) below $5.
- An Application Insights instance. I choose to create a new instance for this project and spend a grant total of $0 hosting this instance for a few days.
- An user-assigned managed identity. System-assigned will probably work as well, but I’ve found that user-assigned identities provide just that more flexibility.
Don’t forget to assign the identity to the web app!
Assigning RBAC roles
As the Application Insights instrumentation key was used for both authentication and authorization, another way for authorization needs to be configured. The way forward here is using Azure RBAC. To allow the managed identity access to Application Insights, configure the role-assignment as follows:
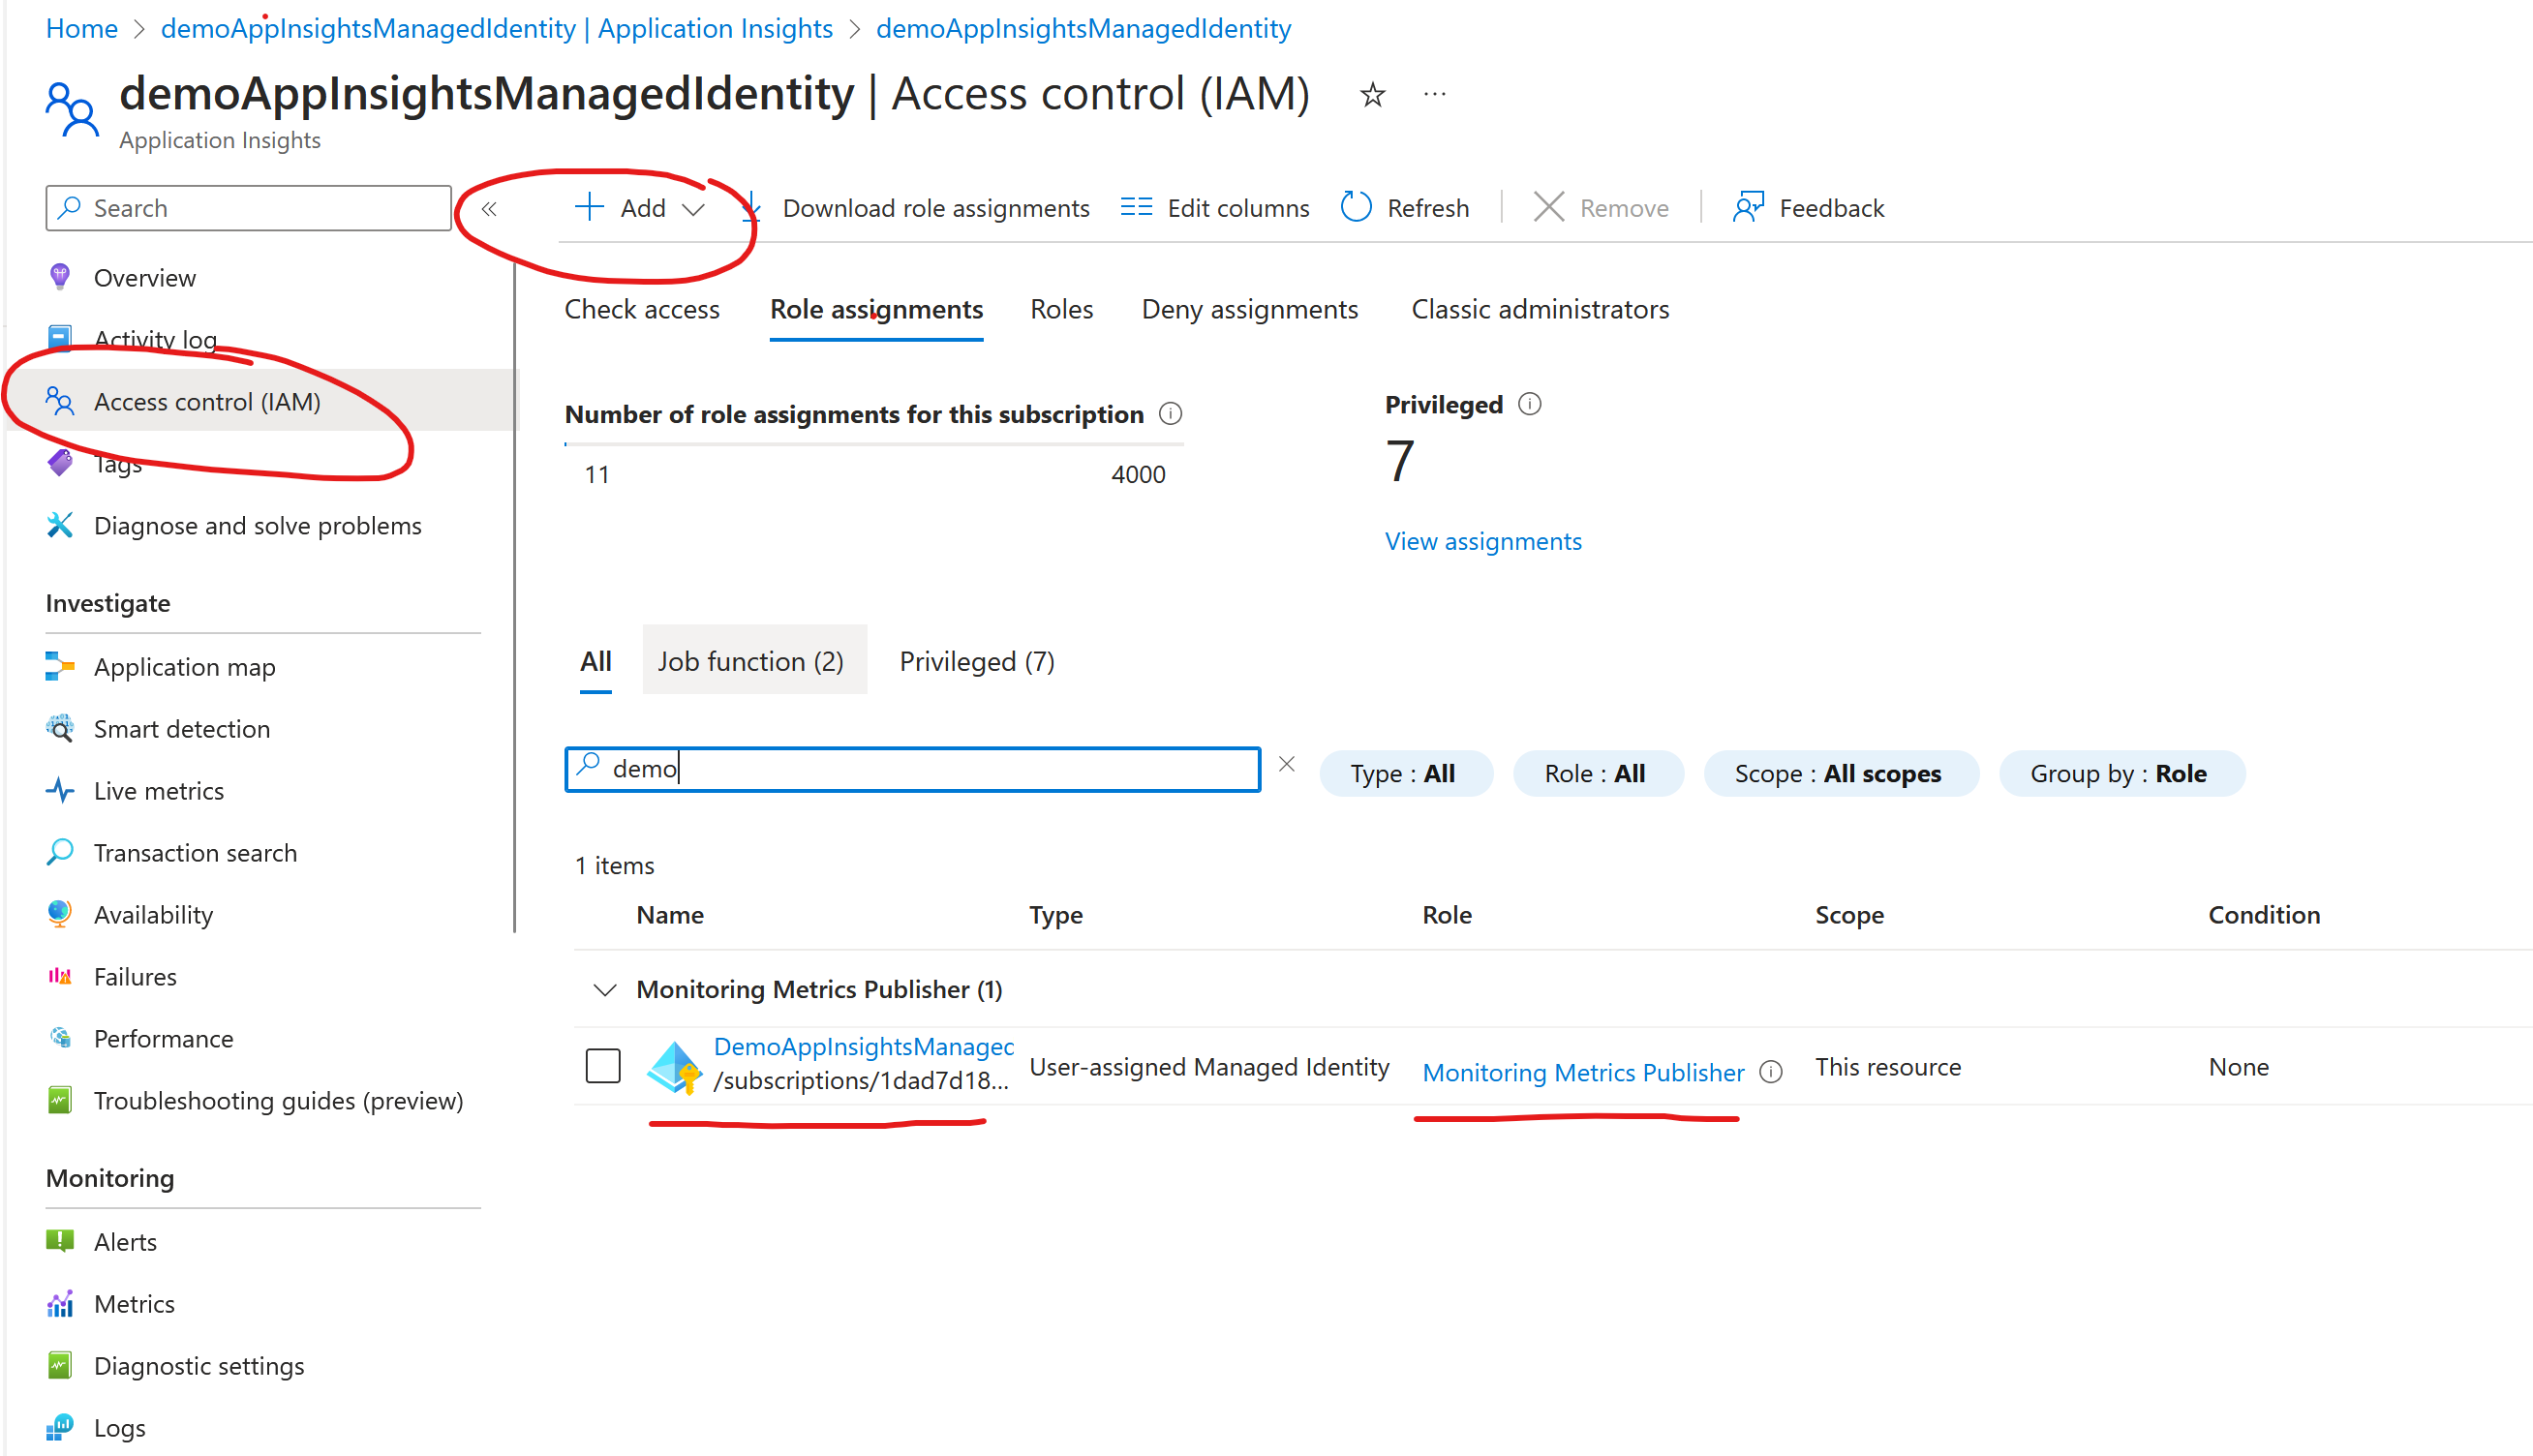
Go the the IAM view on the Application Insights instance and add a new Role-assignment. For the role choose Monitoring Metrics Publisher. Under identities choose the managed identity you created before.
Application configuration
With the infrastructure and authorization configured, let’s writes a simple C# app that proves that an application can log to Application Insights without using an instrumentation key. Create a new ASP.NET MVC application by clicking next, next, finish and make the following changes:
- Install the Application Insights NuGet package.
- Next, configure the connection string (without an instrumentation key) in your appsettings.json:
{
  "Logging": {
    "LogLevel": {
      "Default": "Information",
      "Microsoft.AspNetCore": "Warning"
    }
  },
  "AllowedHosts": "*",
  "ApplicationInsights": {
    "ConnectionString": "InstrumentationKey=00000000-0000-0000-0000-000000000000;IngestionEndpoint=https://westeurope-5.in.applicationinsights.azure.com/;"
  }
}
- In the start-up of the application, in Program.cs add the following code to configure authentication using Managed Identity:
builder.Services.AddApplicationInsightsTelemetry();

builder.Services.Configure<TelemetryConfiguration>(config =>
{
    var credential = new DefaultAzureCredential(new DefaultAzureCredentialOptions
    {
        ManagedIdentityClientId = "14c20300-5af3-4f33-88fa-004ed7a71140"
    });
    config.SetAzureTokenCredential(credential);
});
The guid you see here is the client id of your managed identity. In a real world application you would get this from your configuration.
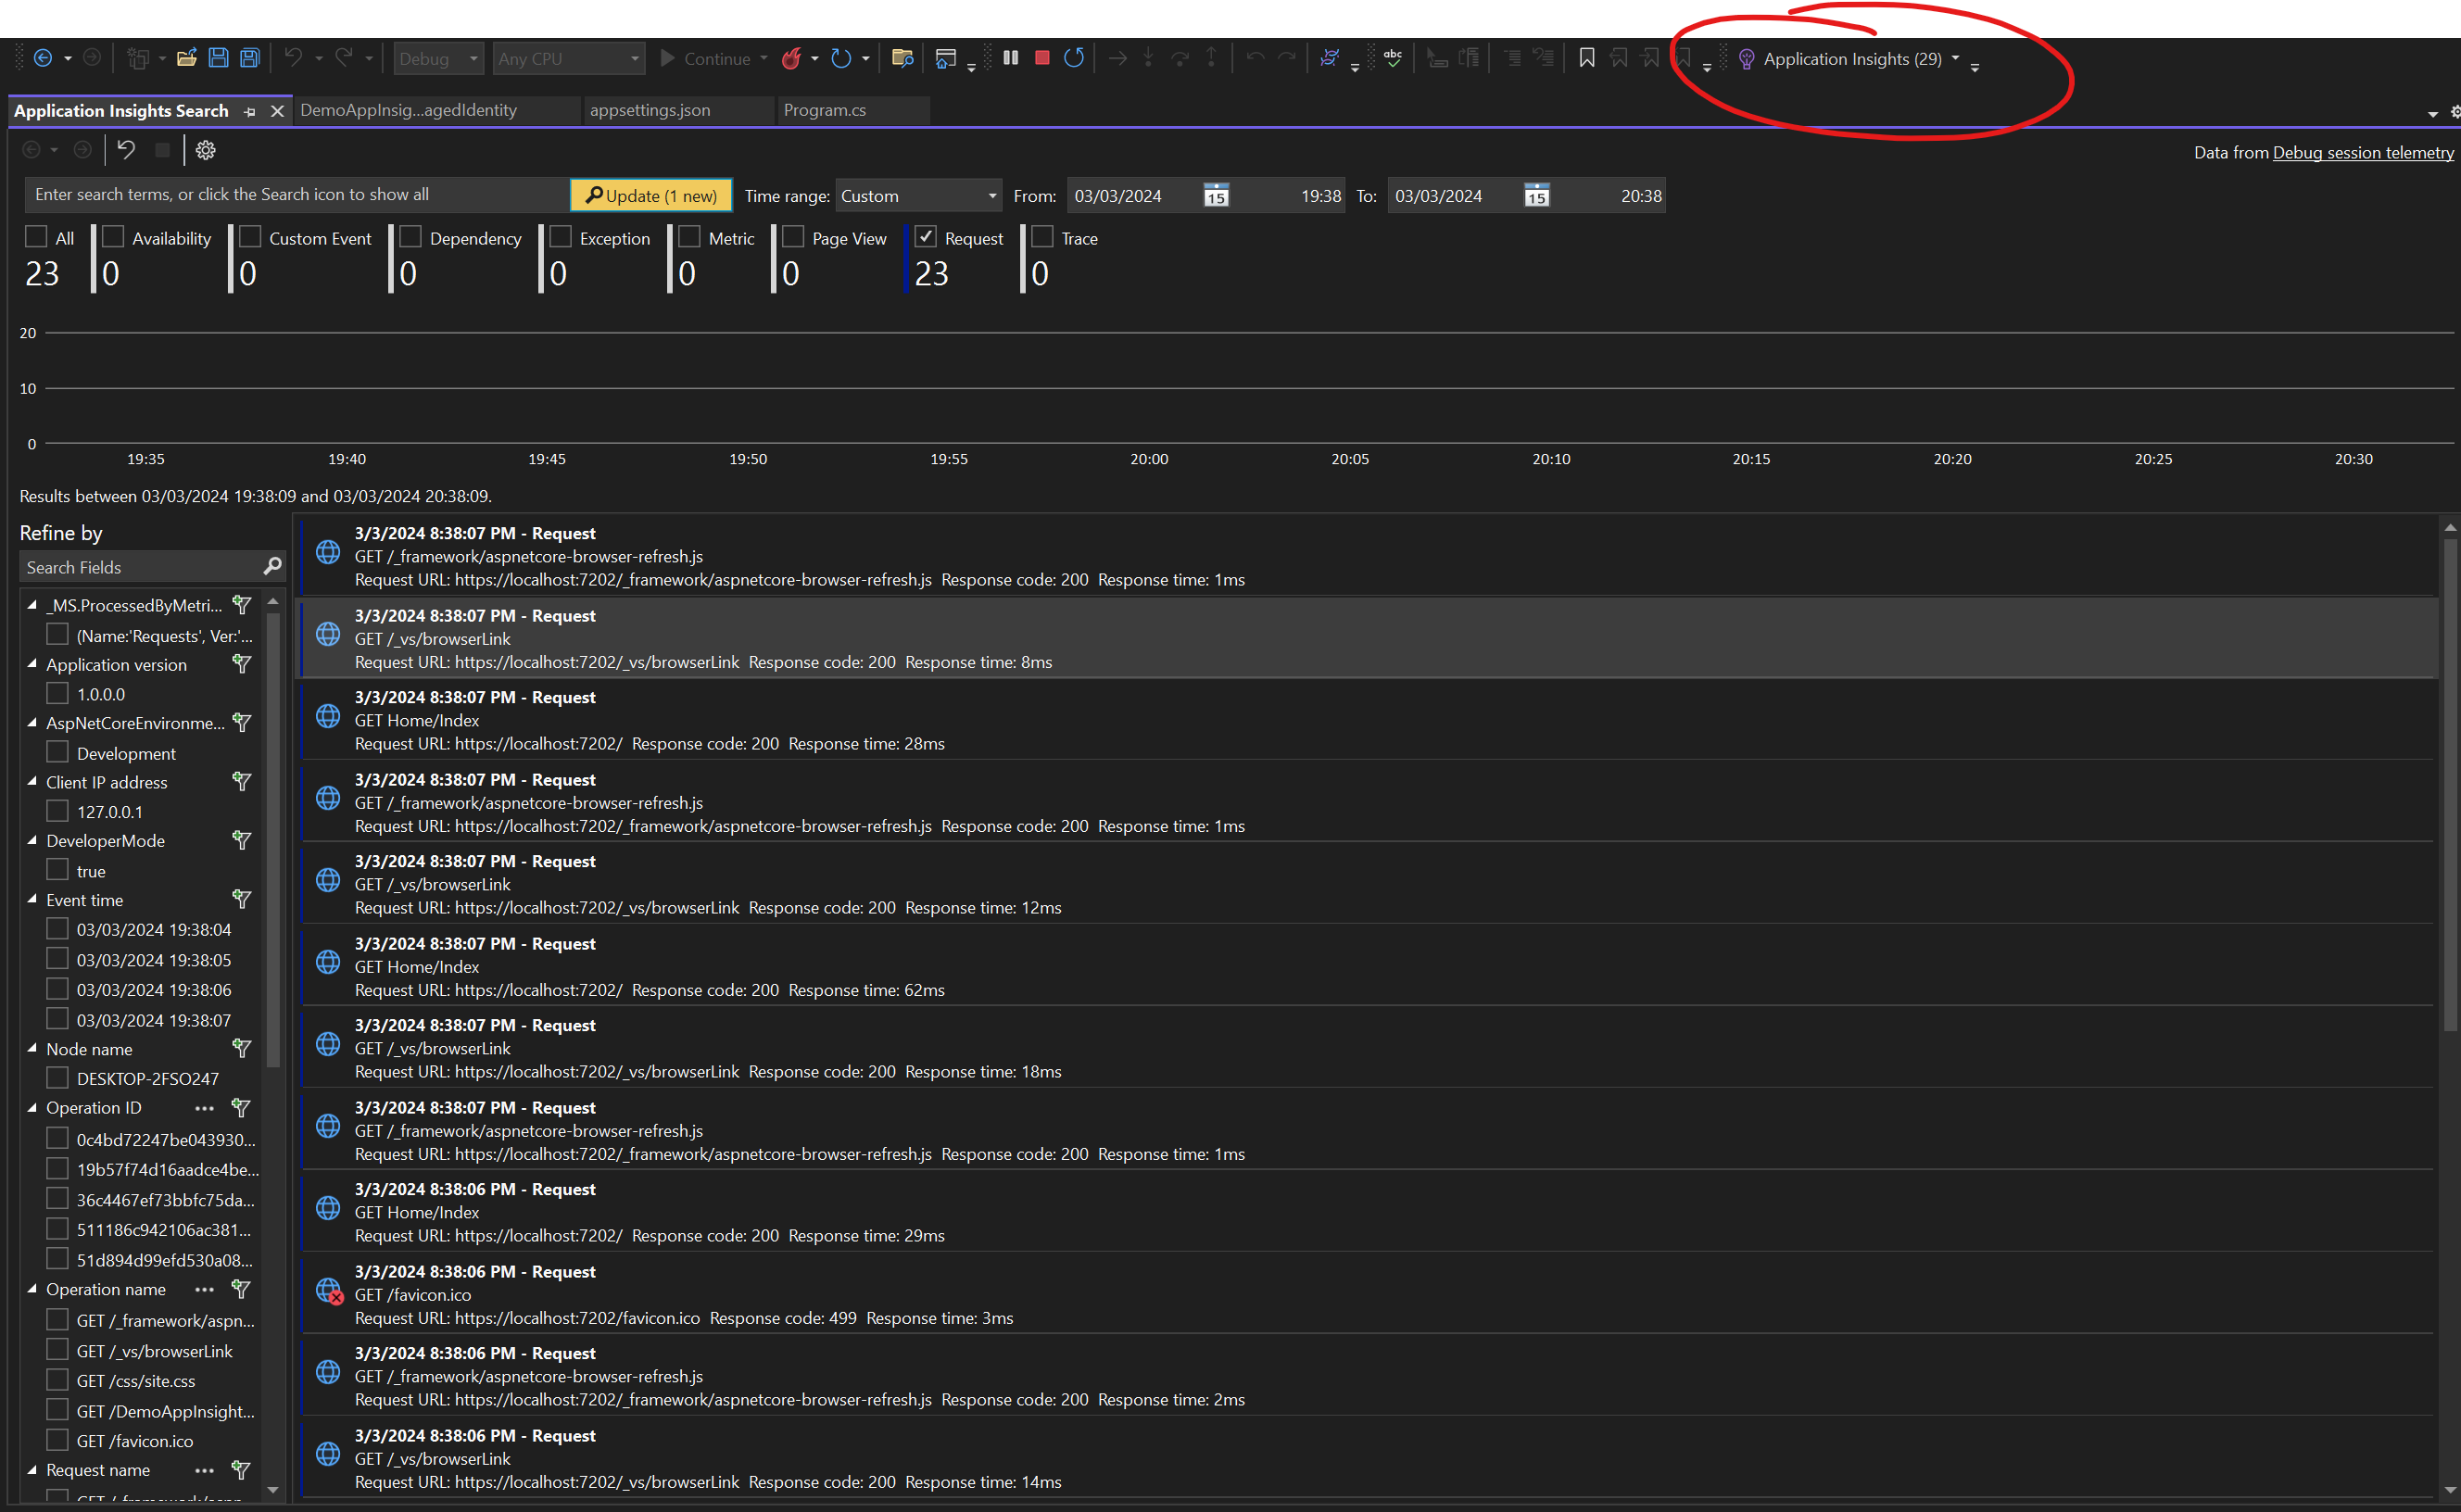
- You can verify you configured everything correctly by starting the application locally and viewing the Application Insights local telemetry. It should look something like this:
Disabling local authentication
To proof that we are really using Managed Identity or local developer identity for logging and to remove the risk that a leaked connection string can be misused, we can actively disable local authentication on the Application Insights instance. To do this, open Application Insights in the portal, navigate to the properties view (way down) and click local authentication at the bottem of the properties page:
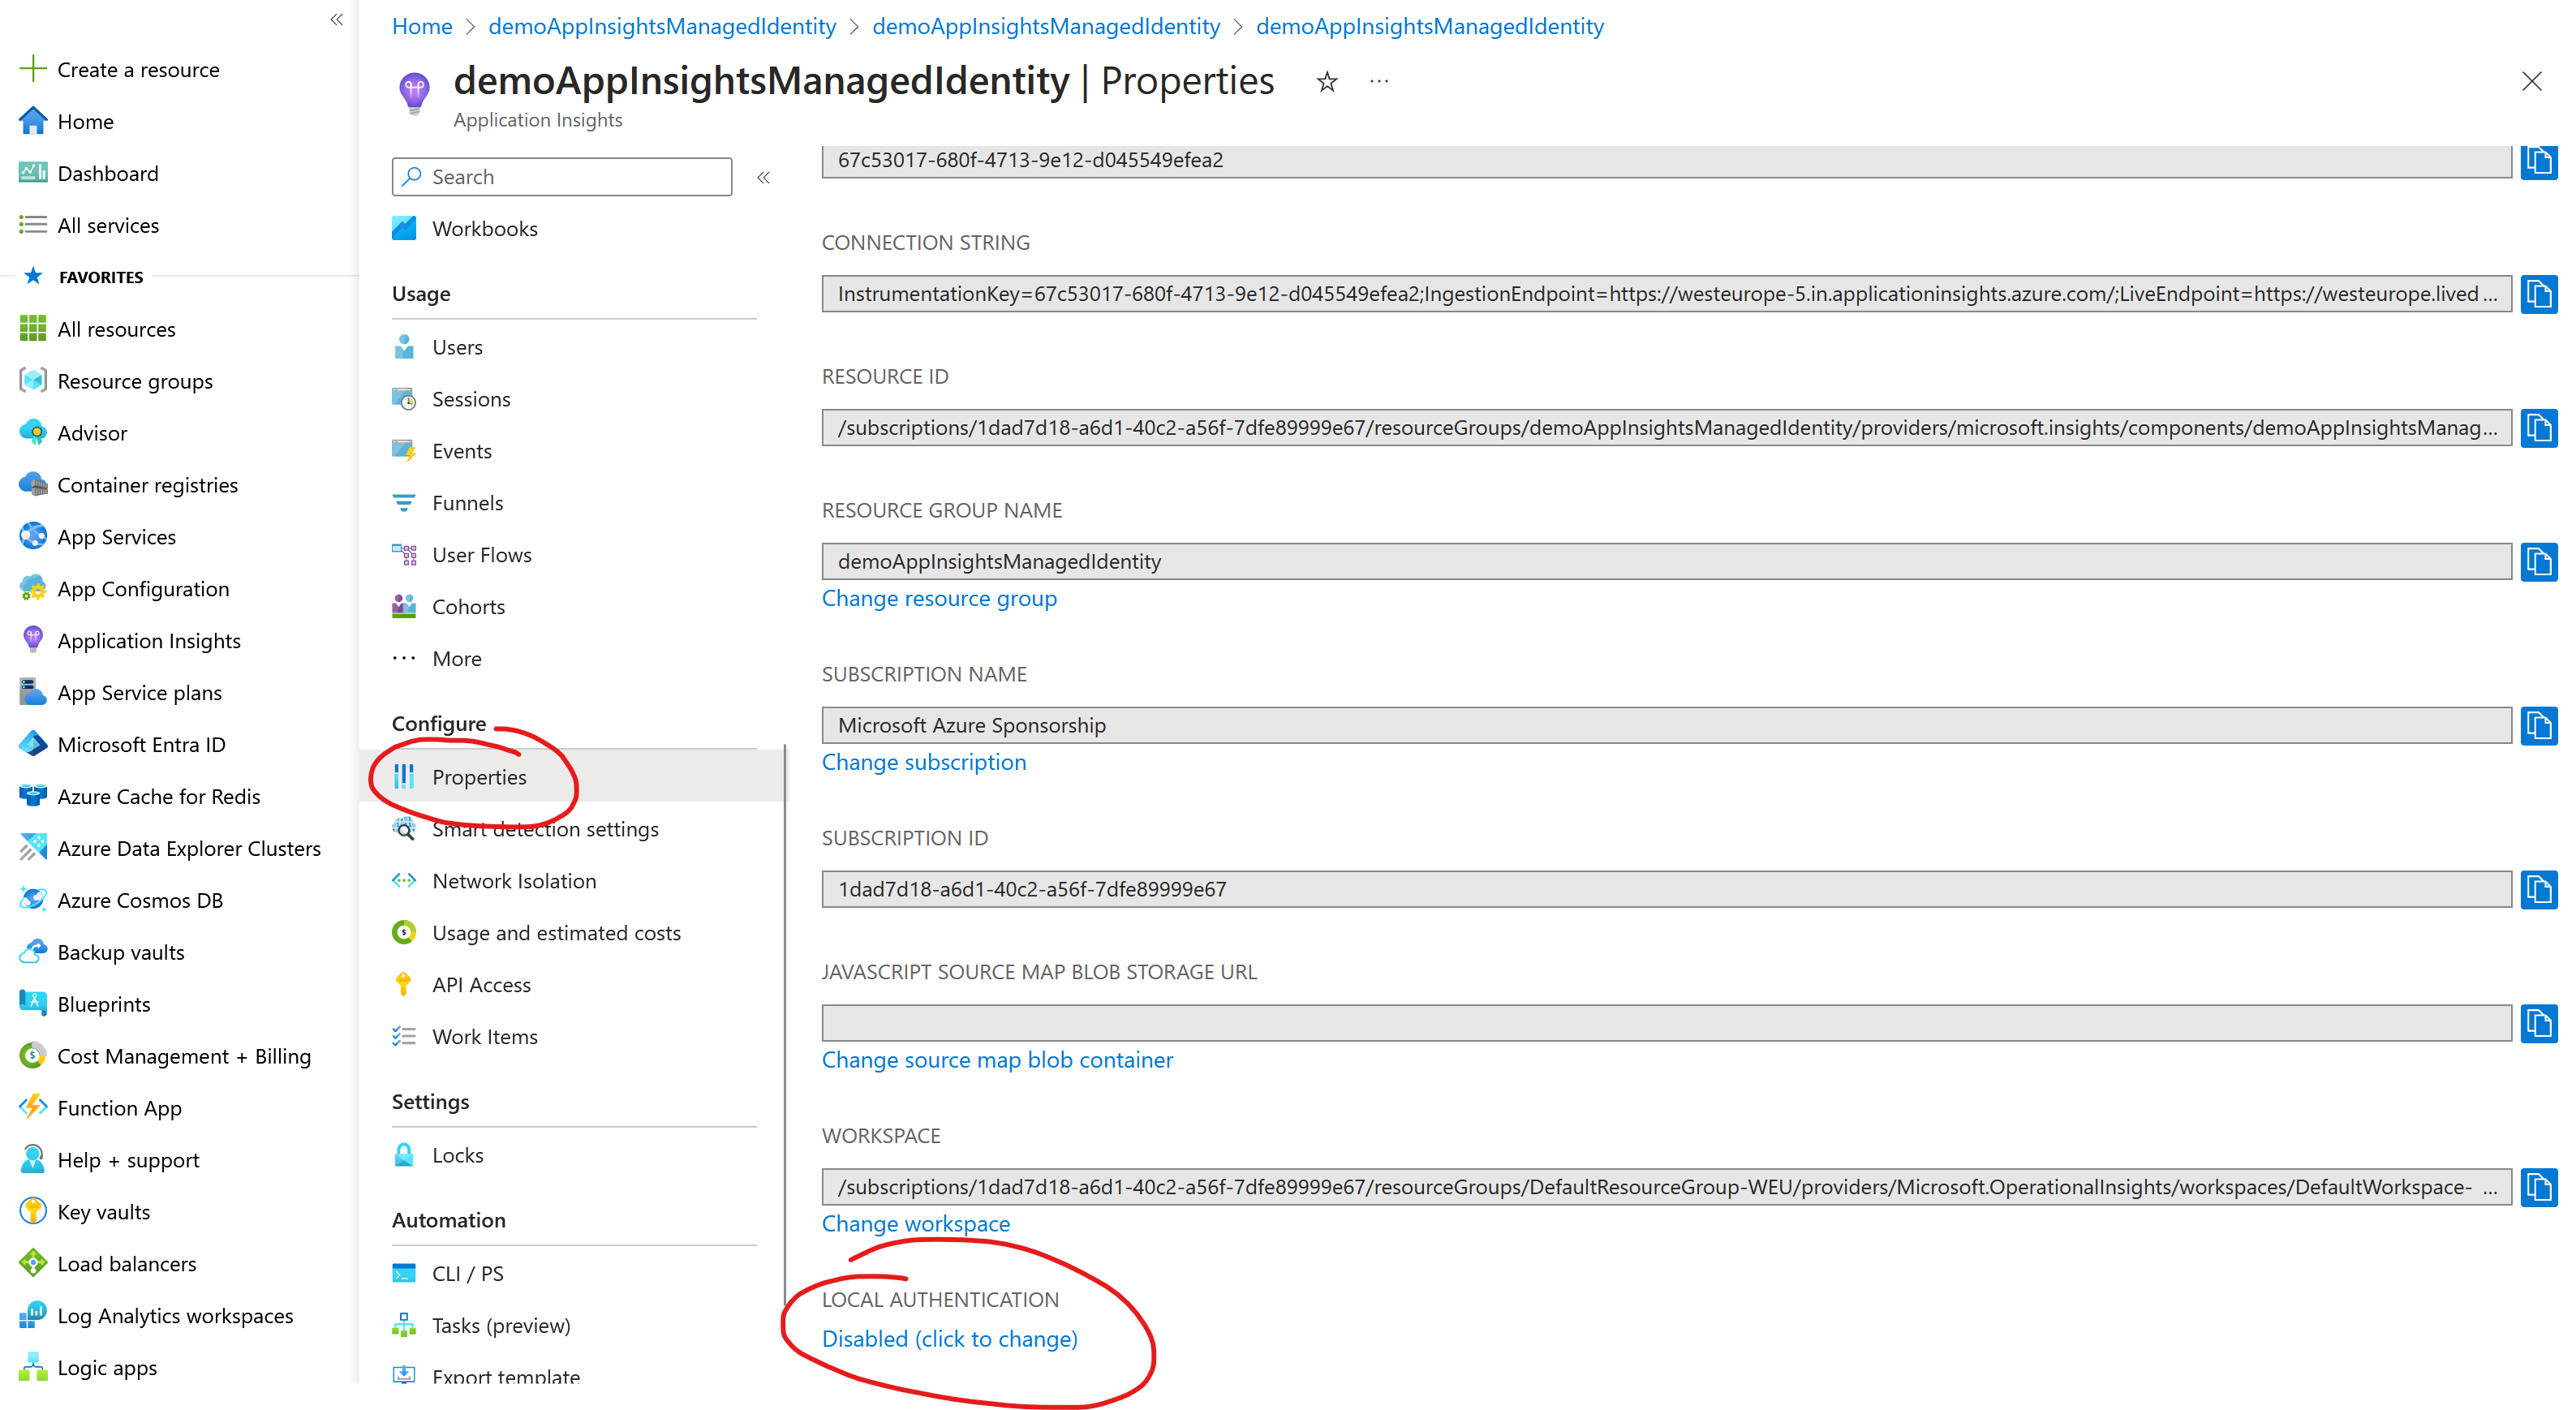
If you click the link, a new view opens where you can enable or disable local authentication and read up on the consequences if you feel unsure.
Running the application
- Deploy the application to your App Service
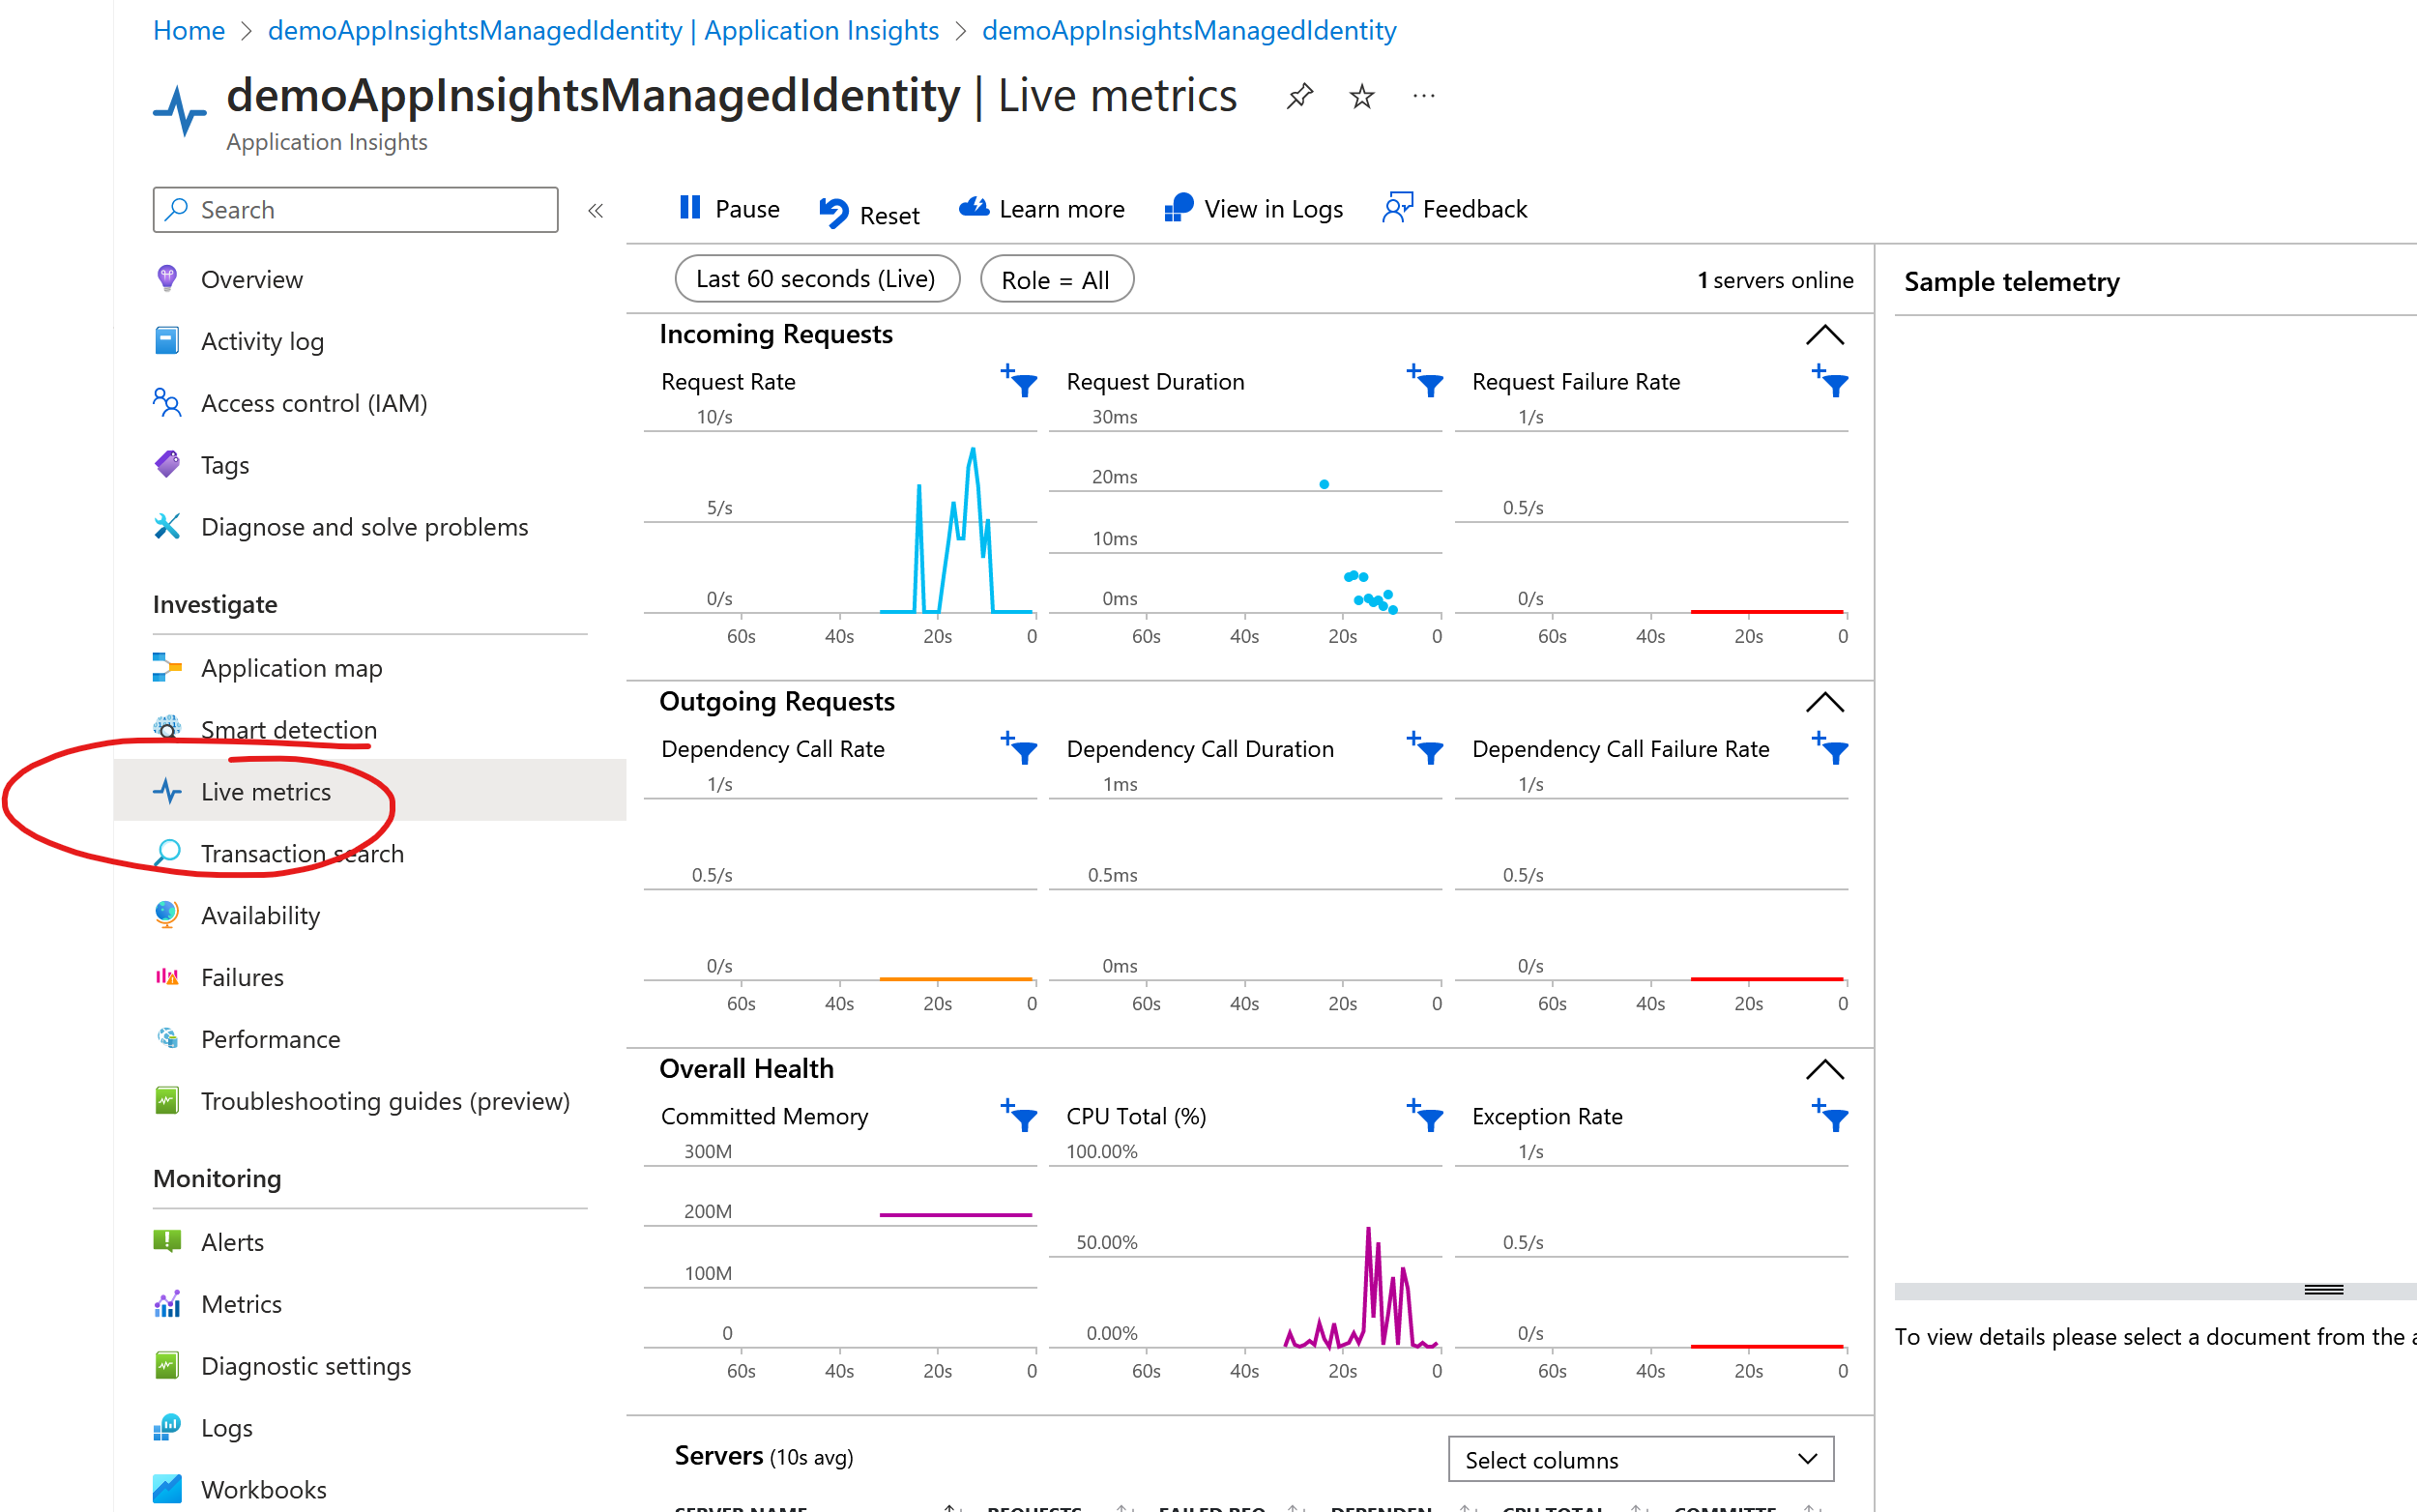
- Wait for the deployment to complete and open the live metrics view in Application Insights.
- Refresh your page a few times and observe metrics and logs flowing in:
Voila! A completely passwordless connection from your application code into Application Insights!